Bedroom Lighting Makeover Part 2: To the Vapour Barrier…and Beyond!
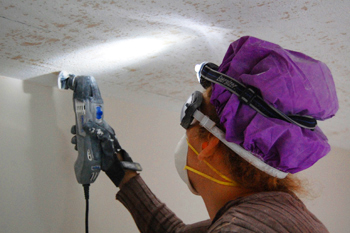
Glamourous, no? But at least I am well protected while using an oscillating tool to cut through the drywall and vapour barrier.
We started out with a bedroom with no lights whatsoever, an unsightly popcorn ceiling, and a plan to change all that. My husband Justin and I knew that our renovation projects tended to take way too long so we decided to get things off to a roaring start by using some vacation time to start our renovation – a renocation, if you will. Our goal was to get the ceiling scraped, the drywall cut out to make room for the wiring runs and the lights, and the lights installed and connected. In short, everything we needed to get ready for the rough-in electrical inspection.
Six Hours in Hell: Removing the Popcorn
It is a good thing to have dreams, but it is a better thing to make them a reality. At least, that’s how I felt the night before we started the work. The next day’s aching muscles made me regret ever wanting to renovate, especially the ceiling, when all the debris has nowhere to fall except on top of you!
Our first step was to scrape the popcorn stippling off the ceiling, and we were dreading it, having gone through it before when we refinished our kitchen ceiling. To explain the dramatic treatment, some newer houses have popcorn finishes that can be moistened with warm water and then easily shaved off with a putty knife. Ours are not like that. The popcorn on our ceilings was sprayed on with some sort of plaster by thorough and resolute men who were determined that it would last through the ages. I have no doubts that had we left it in place, it would be found floating in space, perfectly intact, long after our planet’s destruction.
But enough complaining – with our ladders, protective eyewear and trusty A. Richard scrapers, we showed that popcorn how much we cared about getting rid of it. We just weren’t good for much else afterwards. Thank goodness for takeout, that’s all I have to say!
Trench Warfare
The next day we were ready to start cutting through the ceiling itself to make room to run the wiring and install the pot lights. In Ontario, wire for new circuits has to be secured to a surface every 1.5m, and we would have to drill holes through some joists in order to thread wire through anyway, so a big trench almost all the way around the room would need to be cut. Our project would be would be following these basic steps:
- Cut through the drywall and vapour barrier
- Remove the insulation from the trench so we could see the joists and underside of the roof (storing the insulation for reuse later)
- Mounting the vapour barrier boots, light fixtures, and outlet boxes
- Running and connecting the wire
- Re-insulating and re-sealing the vapour barrier
- Insulating around the recessed light fixtures
- Covering everything back up with drywall, and then finishing.
I was a little nervous about cutting through the vapour barrier, not knowing much about external ceiling work. A vapour barrier is the plastic layer in walls and roofs that prevents warm moist air from escaping into the colder air in exterior surfaces and then condensing as ice in winter. This ice causes all kinds of damage both when it freezes in your roof or wall, and when it melts again in spring. Luckily Justin knows what he’s doing when it comes to renovations, and he explained that vapour barriers can be cut, but they have to be sealed again afterwards.
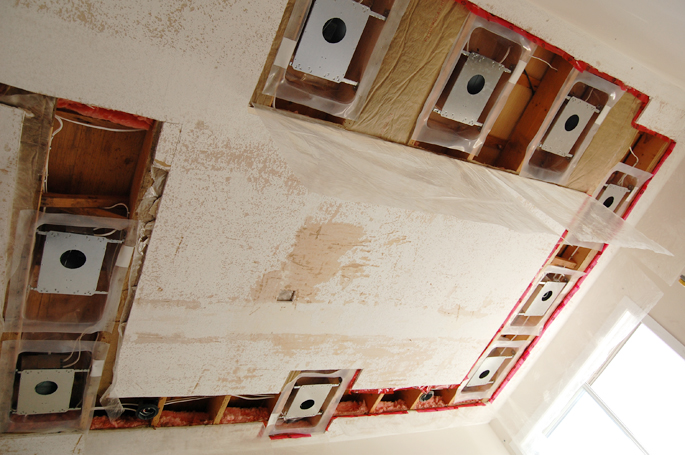
The cutting began after we had measured out the desired position of the lights. We wanted to go for as much consistency as possible throughout the house, so we made all of the lights 18” from the wall, just like in our living room renovation – however, in our bedroom the positioning of each light along each wall would be a more complex issue. As you can see from our plan, where possible we centred along the wall, but on the walls with the closet this wasn’t possible, so we positioned two lights to illuminate the closet. We made the opposite wall match, a decision that means there is a directional spot light that is not centred over the wall beside the window. I think it will be interesting and dramatic – but as with all renovation decisions you don’t really know until everything’s done if it is going to work out or not. That’s the crazy suspense element that keeps me coming back for more punishment!
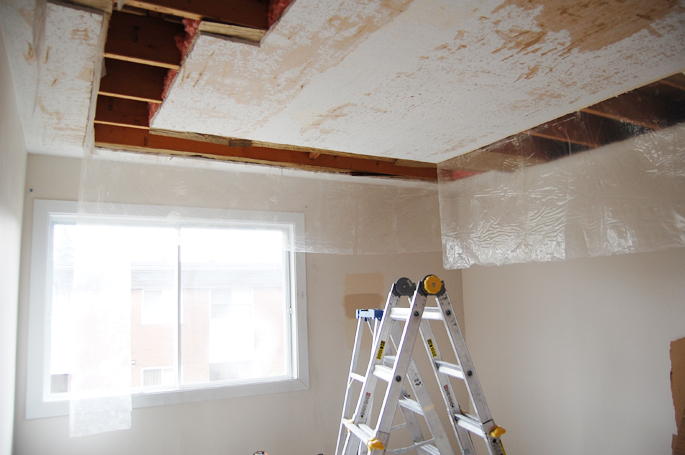
The light and wireing trenches between the joists have just been cut. You can see pieces of vapour barrier sheeting hanging down – we’ll replace most of it, except where a fixture goes.
Cutting the trenches was a messy business, so for safety’s sake we donned eye and breathing protection. As you can see from my stylish outfit above, a headlamp made the work area easier to see and a shower cap reduced the yuck-factor from drywall dust getting in my hair (thanks for the tip Kate!). While we could have used a drywall saw for the actual cutting, an oscillating tool made the seams much neater, which would be helpful when we tape the vapour barrier back together and cut pieces of new drywall to patch up the ceiling. We were able to follow our pencil lines very precisely.
The awful part of cutting the trenches was removing the insulation from them. Justin offered to handle it while I cut the trenches, saying, “There’s no point having two people covered in fiberglass”. Dividing the work this way actually helped get things done pretty quickly. Justin carefully cut through the insulation with a utility knife and took down each piece, storing it in the closet area for later reuse.
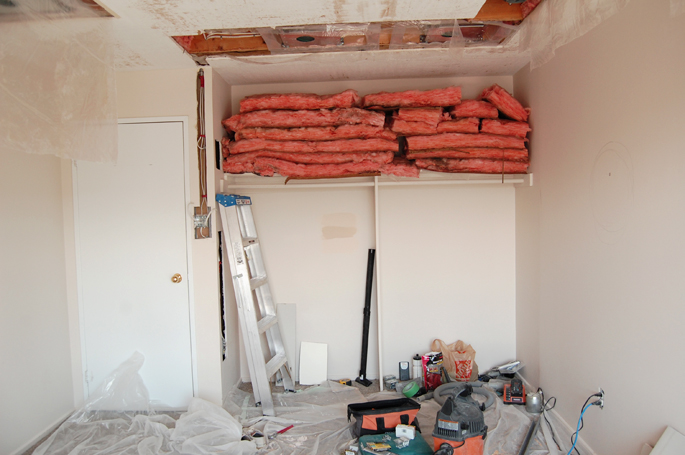
My poor closet! Almost all of this insulation will get reused, and we needed somewhere in the work area to store it.
Uh Oh….
On every renovation project there’s a nasty surprise, and this one was no exception. Once we had the pieces of drywall removed, we learned that the vapour barrier was not actually sealed: the plastic was just laid in overlapping sheets, but not actually taped (not uncommon for builds of the time). Luckily, however, the wood seemed undamaged, and we did our best to properly seal what we could in the exposed areas.
Wiring and Light Position Fine Tuning
When you’re installing ceiling lights, you can have a rough idea of where you want your lights, but a lot depends on the location of the joists. Once you have determined where your joists are, you can measure and cut the holes. The position of the lights between the joists can then be fine-tuned in one of several ways:
- Moving the light to one side of the area between the joists or the other
- Attaching a support like a block of wood to the joist and then attaching the light to the support
- Modifying the position of all the lights in the plan in order to get all the lights between the joists (NEVER cut into a joist to make room for a light!).
The best advice I can think of is to take your time, think things through, and double-check your measurements. It may not always be possible to get everything exactly centred, but we lucked out with our joist spacing.
There were some additional changes we would need to go through while we were dealing with the wiring. While we had installed some additional circuits during our living room renovation project, the circuits would have to be reconfigured a bit to allow for some nice extra features. I wanted the pot lights and the hanging lights to be on separate switches beside the door, but I also wanted to lay the groundwork for some lighting that would go inside the closet while we had the wall open anyway.

This outlet was once controlled by the switch by the doorway – we had to rewire so the switches could control our new ceiling lights instead.
The original wiring was set up for a room with no light fixtures at all. Ontario electrical code requires that some kind of light should be accessible from a switch by the doorway so that you can walk safely into a lit room. To live up to the minimum of this code requirement, the builders chose a random outlet and had the light switch control it, thinking that someone would be able to plug a light into it. Because the outlet they selected was perfectly positioned to gum up the traffic flow, I never bothered using it (although a plug-in pendant could have been secured to the ceiling). A fine example of living up to the letter of the law, but not the spirit! I wanted to change the wiring so that the switch by the door controlled our fabulous new ceiling lights, which involved some extra work for Justin to change up the wires.
To solve the closet lighting issue, I decided on strips of LED lights in plastic tubing. The reasoning for this was:
- Many lights could be run from one fixture, as the LED strips could be put all the way around the closet (we were approaching the limit of 12 outlets/fixtures on our circuit)
- It’s difficult to find fixtures safe enough to use in a closet(that isn’t a walk in)
- We were already going to have two directional spot pot lights shining in to the closet to provide the main illumination, we just needed something supplemental
LED strip lights are actually almost all plug-ins, so Justin installed an outlet in the closet. Ontario wiring code permits this as long as it has a specific purpose and the outlet is used as intended. As long as we plug in our LED strips, and don’t do anything wacky or unsafe like leaving curling irons plugged in there, we would be OK. We would actually be situating the outlet in a rather inconvenient spot for appliances, so we think it will be safe.
As always if you are considering doing any electrical work on your own, know your local electrical code like the back of your hand, and always have the work inspected by the Electrical Safety Authority like we did. It is also important to provide the inspection certificate to your insurer so the work is covered if your house is ever damaged. If your condo regulations are like mine, anything above the definition of the base unit is not covered by the condo’s insurance – it’s on your own (if there was ever a fire and you had no insurance, the condo will rebuild the unit to whatever their basic standards are, not to match whatever work you’ve done above and beyond that).
Installing the Exterior Ceiling Pot Lights and Hanging Lights
When you have a vapour barrier to maintain, there are some extra steps and equipment you need. First of all, for recessed lighting in an insulated space the fixtures need to be IC-rated (insulation contact). These fixtures are approved for use where insulation will be in direct contact with the fixture and are typically limited to 75W; additionally they contain thermal switches which automatically turn off the light if the temperature inside the housing exceeds 90C. Secondly, the pot light fixtures must be placed inside a thick plastic tray – the vapour barrier “boot”. Boots are made of a special kind of plastic that is rated for operation up to 90C, matching the standard rating of the electrical wiring insulation and the cut-out temperature of the IC housing.
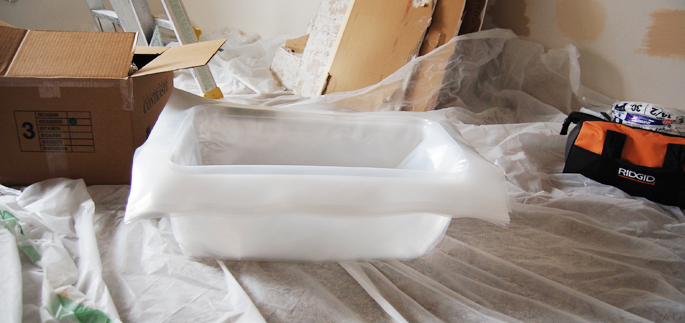
Stacked vapour barrier boots, ready for installation between ceiling joists.
The boot has to be set between the joists wherever a pot light is to go, and is attached simply by stapling the lip to the bottom of the joist. Be sure to do this only after you’re sure you have the right position for the light, or else you end up moving it, which is a pain (but not a disaster). A small hole is made wherever wires for the circuit enter or exit, and these are sealed with sheathing tape (in Canada, Tuck Tape is the clear favourite for this job! In the US, it’s called “Venture Tape”). To complete the vapour barrier, the plastic sheeting is just brought to the edge of the boot, stapled, and sealed with tape.
The ceiling, showing pot light housings and wires installed, and some of the edges have been sealed with Tuck tape. The circuit (and the damage!) goes almost all the way around the room.
Repacking the Insulation
Once the lights were installed and adjusted to their final position, as much insulation as possible had to be put back in. Once again, Justin stepped forward and took care of this messy job, for which I am grateful. Breathing and eye protection are essential, especially when working with insulation overhead. We considered washing down the drop cloths, as we were sure there would be tiny particles everywhere, but we decided on a good vacuuming instead, since the messy drywall sanding phase is still to come. Clothing used after working with insulation is fine after it goes through the washing machine – just be sure to use old work clothes and ideally wash them separately.
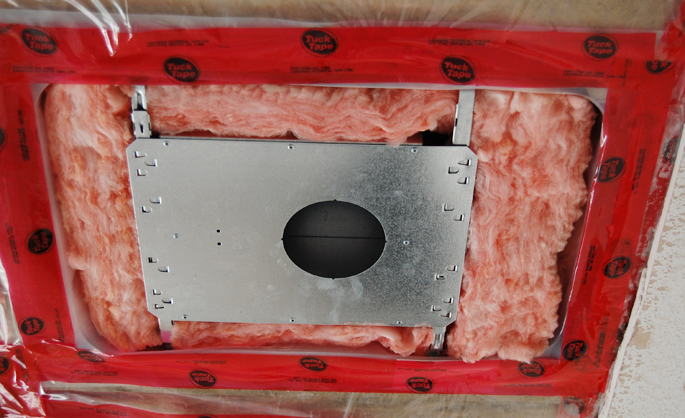
The boot with the insulation contact-rated pot light fixture installed and sealed. Insulation has been tucked between the fixture and the boot.
Ready For Drywall!
How did we do on our renocation? Pretty amazing (for us) – we were almost ready for the rough-in electrical inspection after our week was done. Now that everything is installed, wired and inspected, we’re ready to start the jigsaw puzzle of cutting and fitting drywall pieces into the ceiling. Then it’s several cycles of mudding and sanding, and we’re ready for the fun part. We won’t be reaching our initial goal of being done by Canada Day, we’re still going to be done in July, so I am still really happy and excited. I can’t wait to have a bedroom again, but I am learning so much about how our house is structured – and about camping out in my own home!
by Jennifer Priest
Follow me on Google +
Thanks Leanne! It's been taking a bit longer than expected, but the finished pics are coming up soon!