Let There Be Light! Part 3: Wiring and Additional Circuit Installation
Designing a lighting scheme can be a delightful challenge, but every dream requires solid planning if it is to become a reality. Any light needs a power source, and that means connecting it to the electrical system of your house. How much power will each light draw? How many lights can you have without violating electrical code? How will the wires connect lights to switches, and the switches to the circuit panel? A wiring plan is a complex thing.
Before I get into the juicy details, I want to caution you that incorrectly wired circuits can be very dangerous. We were fortunate in that we had Justin’s expertise – he had experience with wiring projects and a very thorough understanding of how electricity and electrical systems work. If you don’t have this level of understanding already, spend the research time to make sure you know what you’re doing. We definitely consulted the electrical code for our area, and understood and adhered to the rules. Many renovators will want to hire a qualified electrician to carry out this aspect of their renovations.
As with other advanced home renovation projects, the number one rule is: if you don’t know what you’re doing, don’t do it.
Design Details and Wiring Plan

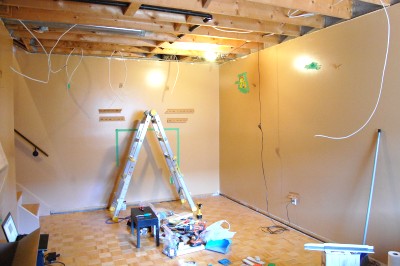
The plan for the new layout, showing where the new lights will go (white circles).
The basic problem I was trying to solve was simply that there were no lights whatsoever in the room, and plugging in a bunch of floor or ceiling lamps would have cluttered the tiny room visually. But deciding what kind of lighting to add, and exactly where, would require some thought. After reviewing a lot of lighting schemes in pictures in magazines and online, I decided to use a couple of rows of pot lights to illuminate the walls, plus a trio of hanging pendants in the corner to add some fill light. At one point I was advised that pot lights were generally arranged in a grid over the entire ceiling. I had seen installations like this, however, and felt the look would be inappropriate for the room: I felt there would be too much light in the small room and not enough play between light and shadow.
One of the things I knew I wanted for the lighting scheme was flexibility. Because the room would be used for many purposes, I wanted to be able to adjust the lighting to suit different moods. We would need enough light to read by, but I didn’t want to be stuck with a lot of glare when doing yoga or watching movies. With this in mind, I decided that each of the main sets of lights (north pot lights, hanging lights, and east pot lights) would need to be on a separate switch. Each switch would also need to be dimmable. The single pot light on the west side of the ceiling would be grouped with the lights on the opposite side of the room on the east.
Switch location was not a difficult decision. The ideal location would have been near the front door, however this would not be possible without major structural modifications. From a previous project with my father which involved opening the wall by the front door, I knew that there simply wasn’t enough room between the studs for four switch boxes side by side. There wasn’t even enough room for two, and I felt arranging them vertically would look silly. Luckily, it was not essential for the living room light switches to be there anyway, from a usability perspective.
The switch boxes would therefore be positioned at the bottom of the stairwell leading upstairs. There would be enough room for 4 switches side by side. Also, there was already a light switch in that location for the stairway lights, which could easily be replaced to match the 3 new ones.
The north and east rows of pot light would each have their own separate sequential or ‘daisy-chained’ set of lights. This would allow us to control each row of lights as a single unit, but also to save a bit of money on wire – it does add up, even in a small house, if you are doing runs all the way from the circuit panel in the basement, plus to several rows of lights. Even with our attempts to economize, we ended up using 3 100-foot coils of 14-guage wire!
The Wiring Runs

Installing an octagon box for pendant lights. Because we wanted to position them away from the existing studs, we had to build additional framing to support the weight of the lights. We built them well enough to support a person’s weight, in case we ever wanted heavy lights.
Here’s one of the circumstances in which our initial project scope creep of removing the ceiling drywall paid off. If we had not done this, we would have had to cut holes in order to feed through cable anyway, and then repair the holes. Also, we would have had more complex runs trying to minimize this. Since we had removed the ceiling, we could feel free to situate wiring runs where they would work best. In a nutshell, most of our runs came up from the basement through a cold air return, connected to the switch in the stairwell, and then came into the living room ceiling through the most convenient path between the studs.
Circuit Panel
By the time we were finished adding circuits, our circuit panel would end up looking like something from a Geiger illustration – but would be neat, completely safe, and Ontario electrical code-compliant. We wanted a lot of lights, and since you can only have 12 lights per circuit in Ontario, this meant more circuits.
I can admit that working on the circuit panel was terrifying. Justin’s very realistic pantomime of getting an electrical shock when work started did not help! After my heart rate slowed to normal, and Justin was done laughing, he settled down to explain how the panel was structured, and what areas were safe to touch (if the panel was live) and what ones weren’t. Under his watchful eye, I even wired and plugged in one of the breakers myself.
Scope Creep #2: Advance Wiring for the Upstairs
Upstairs Wiring
Partway through the wiring for the living room, I realized that I would someday want to improve the wiring and add lighting on the second floor as well. I was contemplating closet lights that come on when the door opened, and definitely more lights in the bedroom, which currently has none. An additional light in the bathroom would definitely be helpful, as the shower is almost too dark to shave in.
Eyeing me askance, Justin said, “You understand that this will postpone completion of the living room”. When he was satisfied that I understood this, we started to talk details. I produced a layout of where I was considering additional lights, and Justin agreed to the plan. We ran the needed wiring up from the basement, through areas we had opened up in the living room, and to the required outlets and switches.
For the second time I was very glad we opened up walls and found a problem (read about the first encounter here). Not only was the entire second floor run from one ridiculously convoluted circuit, but we found out that whoever did the wiring before us made a terrible mistake: they twisted aluminum wire and copper wire together without adding the anti-oxidant paste. This paste must be added whenever you are working with aluminum in an electrical circuit – it prevents the formation of an outer layer of aluminum oxide, which resists current flow and causes the wires to heat up. The plastic coatings for the wires had thoroughly melted together, and there was even some exposed wire. If allowed to continue, eventually there could easily have been a fire.
When you decide to do some rewiring, you should be aware that you are responsible for bringing anything you open up to current electrical code. If you don’t touch it, it is ok that something is not up to current code, because someone in the past did it (this is referred to as a “grandfather clause”). We installed a couple of arc-fault interrupt breakers for the new circuits that went to the two bedrooms, which is now mandatory (an arc-fault interrupt breaker stops the current when sparks from faulty wires are detected – this could prevent fires happening while people are sleeping).
I know this statement is going to come back to haunt me, but sometimes, scope creep in a project can really save time down the road. This may sound like an excuse, but I do feel that we did the right thing in delaying the completion of the living room work in order to avoid having to open up our ceiling again later on.
The Rough-In Inspection
Because we were using retrofit potlights, we didn’t need to install them yet, just run the wires.
Why have your work inspected? The main reason is of course to ensure you’ve done everything right and you won’t burn your house down – a house with bad lighting is better than a fire! The other reason is so that you can include your work in your insurance policy. If there is ever a fire caused by something else, you want to make sure the insurance company can’t blame your handiwork. In Ontario, work is inspected by the Electrical Safety Authority, and they have a page containing the inspection forms.
A rough-in inspection is an examination of your circuit panel work, the way the wiring is run, plus a sample of how swiches and lights are connected. The final inspection occurs after the drywall is sealed, and all lights, switches, and whatever else you have installed is complete. The inspector uses a tool to confirm that live, neutral, and ground wires are correctly attached and create a proper circuit.
Rough-in electrical inspection details:
- The form should be sent in 48 hours after construction begins – we waited, which was good because we added to the project during construction. On the form, you have to declare what the project includes.
- We were able to book our inspection and get an appointment within 4 days.
- The fee (paid in advance of the inspection) came to just shy of $200.00.
- We made sure we had a copy of our circuit panel diagram and our wiring plan handy in case the inspector needed to do some checking.
The inspection itself did not take long, and the inspector appreciated the extra effort we had taken to arrange wires as neatly as possible, including the liberal use of cable straps to ensure that the eye could easily follow the path of each wire from source to destination. “Do you want to teach a course?” joked the inspector, looking at Justin. He continued, “I see a lot of frightening work, so it’s refreshing to see things done correctly.”
With a passing grade, we were ready to proceed to the next step in the project.
Next post: reframing the living room ceiling.
by Jennifer Priest
Follow me on Google +
No comments yet.
Add your comment