The Essentials of Deck Planning and Construction
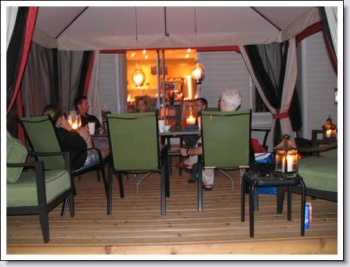
If you’re thinking about building a deck next summer, fall is a good time to start planning. Chris Clarke spent the summer building his new deck, and now that the project has come to a successful conclusion, he has kindly agreed to share his expertise. As a professional contractor, Chris has a lot of experience not only with building his deck but others as well. Chris’ deck was 15 feet wide and extended 17 feet out into the yard. The layout included a small flight of stairs descending to ground level in the yard.
As with all renovation projects, the key to success lies in good research and thorough planning. The following should help get you started.
Planning
Why plan? In a nutshell, it will save you time and money. Of course it will help you figure out if the layout you want is aesthetically pleasing, but also once you start figuring out how much wood you will need, etc., it will help you figure out the cost – you can then decide if it is within budget. A good plan will also help you figure out your construction process – the last thing you want is to be halfway through a project and thinking “I wish I had done it differently”.
You want to go into as much detail in your plan as possible, so that you can find those “gotchas” before they happen. A plan will allow you to estimate your material needs for your shopping list, and also put together a cut list for your wood. Don’t forget that real-world lumber dimensions are different from nominal dimensions: for example, a 2 X 10 beam is actually 9 ½ inches wide.
Be sure to factor in the time costs as well. Most decks could be finished in a summer, but if your dream deck has multiple levels, railings, a roof, stairs, and has to support a hot tub, then building may take a lot longer than you think, especially if you haven’t done any projects like this before.
Overhead View
An overhead plan on graph paper or suitable software is the way to start (make sure you use one scale consistently between plans). The scale will depend on the size of your deck, and what features it has. You may want to create several overhead plans: one for structural things like the footings and joists, and another for the finishing layer.
A deck will have a minimum of 2 concrete footings if it is attached to the house. Depending on the size of the deck and the desired stability, it may need many more. For his deck, Chris has two rows consisting of 3 footings each (spaced about 8 feet apart) plus the deck attaches to the house for additional support. This ensures a lot of stability and support in the middle areas of the deck, where people will be gathering.
Your finishing layer plan can be used to plan the configuration of the deck boards. Decking is sold in several standard lengths: 8 feet, 10 feet, 12 feet, 20 feet, and 22 feet. If the width of your deck exceeds these, or if you want to use shorter lengths, you need to plan the pattern your planking usage will take so that each row is offset. One consistent seam up the middle of your deck will look terrible, and create an area of weakness. Random lengths will also look terrible. To solve this, you could try alternating rows. For example, if your deck is going to be 16 feet wide in total, you may choose to have 2 alternating rows: row 1 could have a 4-foot length, an 8-foot, and another 4-foot and row 2 could have two 8-foot lengths.
With screw holes, it’s another story: you want nice consistent rows of screws (again, random screws look bad). But that means you will need joists that are spaced correctly for your plan. You want to be able to centre the piece of decking over the joist, so that your screw hole can go in the middle of the plank.
Face-On View
The Face on view on your plan will be sighted at ground level, looking towards the deck and house. This will allow you to plan for things like differences in ground elevation (you may need a separate side view if there is a serious slope away from the house). It will also allow you to decide if you want to cover the front and sides of the deck to hide the structural elements (or at least any cut ends of beams) with some kind of skirting. Depending on how polished you want the look to be, you may cover the outside of the deck with some sort of lattice, or the same kind of decking as the horizontal surface of the deck. Gardeners may want to plan any landscaping that abuts the deck.
A critical part of a deck plan is accessing it from the house, and how far the drop is from the house to the deck itself. The minimum step that you want to have is 6 inches from the door to the surface of the deck. You don’t want to make it tighter than that, because you want to allow room for snow build-up (check the building code regulations for your area). Depending on the grade of the ground outside the house, you might want to handle this with stairs.
In planning the basic structure of the deck, you want to work backwards from where the final height of the deck should be, factoring the heights of the decking and support beams, down to how tall the height of the concrete footings will need to be.
Permits
In Ottawa, if your deck is going to be attached to the house (literally bolted on), then you need a building permit and must go through an inspection process. There’s an advantage to doing this for DIY rookies: an inspector will catch any serious errors that could cause your deck to be unsound. For people working with a contractor they do not know, it is a way of making sure that the work has been done correctly. The disadvantage of going through this process is that you may end up being charged more for property taxes, depending on what kind of deck you have and whether it ends up being classified as “living space”. If the deck is not attached in any way to the house, you don’t need a permit.
It is critical to find out if you have any water, sewer, gas, electrical, phone or cable lines running through the ground near where you plan to build. In Ontario, the “Call Before You Dig” program can help with this.
Dealing With Ground Topography
An important key to planning your deck will be dealing with the level of the ground, or “grade”. During the planning stage, one of the most important steps is to establish what the high and low areas of ground are around your house, so that you can figure out how your deck is going to end up being level.
To start, you can get a general idea of the grade visually. Once the time comes to do more precise planning, you can use string lines and a long level (or a straight 2 X 4 and a long level) to figure out where the overall slope of the ground is directed.
The ground should slope away from the house, so that any water (especially meltwater in the spring) is directed away from the house. When Chris did his planning, he learned that this was not the case with his house. Because this could result in serious foundation repair bills in the future, he opted to get this fixed before he started on deck construction. You want to aim for a grade of ¼ inch per foot, sloping away from the house.
You also want to have your deck sloped very slightly as well – again, this will help direct water away from the foundation of the house. The grade for Chris’ deck is approximately a 1 % slope (as the deck gets further away from the house), which is about ½ inch over 4 feet: enough to carry the water away, but not enough to be noticeable. You can get away with less – this is a Mike Holmes-esque overbuild that allows for a considerable safety margin. The slope of the deck should not exceed 2%, or it may be noticeable.
Deck Construction Outline
String Lines
During construction, keeping your string lines set up is a great way to check that everything will come up to the correct final level. Chris set his up so that they extended 4 feet outside his work area, to keep the string supports out of the way of the work. As you build, check everything with a level at every step so you know if you need to make any adjustments to allow for minor imperfections that crop up.
Checking for Square
A construction project is said to be “square” when its corners all measure 90 degrees. There is a good ratio tool that can check this for you called the “3-4-5” measurement:
- Choose a line, starting from the house, and measure along 3 feet.
- From the same starting point, angle out 90 degrees, and then measure out 4 feet.
- The distance between the ends of these two lines should equal 5 feet.
The next set will be 5-12-13, and you can keep getting bigger. These number sets are called Pythagorean triples, and Wikipedia has a list of them. Or, you could measure the diagonals, and ensure they are equal.
You will need to do this when setting up your string lines, and you should also check this periodically throughout the project to verify that everything is still square.
Concrete Footings
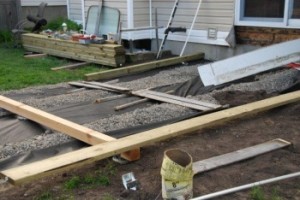
Concrete footings are the foundation of your deck. In any climate where the ground freezes in winter and thaws in spring, the ground will develop small hills and valleys over time, and can cause your deck to tilt (“frost heaves”). In Ottawa, a deck footing should go at least 6 feet below the surface, but it depends on where the frost line is in the area.
Creating the concrete footing might be a part of the project that some may wish to hire a contractor to do. There are options available like helical piers (or “techno posts”), that don’t make a lot of mess. A helical pier is basically a large coated metal screw that stays in the ground. This can be a really cost-effective way of dealing with the footings, especially if you don’t have much experience (or if you don’t have much time).
Digging holes for footings can be done in several ways, and may depend on if it is possible to get outdoor access to the back yard, or if the equipment will have to go through the house. Chris rented a one-person auger from Home Depot, which requires outdoors access to the back yard. An auger is basically a giant gas-powered corkscrew that drills a hole into the earth. A smaller two-person auger can be carried through a house, but it requires some muscle power to manage it while in operation, and may not be a tool that can be used by everyone. The timid may find augers difficult as well – they can be jerky if they catch something in the ground while digging.
To create concrete posts, a large cylindrical cardboard form called a sonotube is placed in the hole, the concrete is poured in, and the support beam structure is placed on top. In most areas, a drainage layer below the footing should not be necessary.
Once it hardens, the sonotube is cut from the concrete pillar above the ground line. This is done with a utility knife – the sonotube is designed to peel away. Below the ground line, Chris recommends wrapping the sonotube with a layer of 6 mm poly plastic before inserting it into the ground., so that the ground cannot bond with the pillar. The freezing ground with slide harmlessly against the footing, instead of grabbing it and potentially moving it. The concrete should show at least 6 inches above grade, in order to protect your deck from the damp earth. In most projects, the footing will be hidden by the skirting for your deck.
Support Beams
Support beams can be made of 4 X 4s set into the concrete, or paired 2 X 10s set into a saddle which is embedded in the concrete. The floor joists will then sit on top of these beams.
Support beams and joists are generally fastened together with carriage bolts (aka “through bolts”), or lag bolts that screw in. An impact driver can be a handy tool during this stage of assembly.
When attaching a deck to a house, lag bolts are generally used, as carriage bolts require access on both sides. If the situation permits, you can bolt to the wooden frame of the house, or to the concrete using special fasteners.
For the wood of the beams, you should always use pressure-treated lumber, and treat any cut ends with an end coating preservative, which will prevent water penetration and rot.
Once your support beams are in place and have been verified level and square, you will need to measure out and mark where your joists will go. A speed square is a great tool to have handy when making your marks – you’ll want to draw a line down the side of the beam as well as on top to make sure it’s positioned correctly. Play it safe and mark the correct side of the line with an “x”.
Joist Spacing
Remember that a deck not only has to support itself, but the number of people who could potentially be standing on it. If you like to entertain, you could have a barbecue, possibly a bar, and (for example) 15 or 20 guests all standing on the deck at the same time.
It doesn’t hurt to overdesign when it comes to the structural support side of things. Having lots of support means there is a comfortable safety margin, but also it will make your deck last longer and look better. If you skimp on the support, your deck could develop areas where it dips over time.
For a deck that is 15 or 20 feet square, you could possibly get away with 16 inch centres (16 inches between the centre of one joist and the centre of each neighbouring joist). Chris used 12 inch centres for added stability: there is less flex when people are stepping on it. The only downside to this level of thoroughness is rows of screws every foot, which may not appeal to everyone, visually speaking.
The joists themselves should be made of 2 x 8’ planks at a minimum – Chris recommends 2 X 10s (or even 2 X 12s for larger decks or if there are to be fewer joists).
Another factor that can influence the size and spacing is whether you will be supporting each joists with 4 X 4 beams underneath, or if the joists will be sitting in joist hangers.
Once the joists are in place (and again, are level and square) you will need to measure where all the deck screws will go. Recheck these measurements are correct: a line of screws that wanders is extremely noticeable.
Decking and Finishing
For the deck planks, Chris used natural cedar, which has a nice feel to bare feet. There are many options available, including pressure-treated wood. Deck planks are 6 inches wide nominally, but are 5 ½ inches wide in reality – this should be factored into your plan.
Gaps between decking boards should be no more than 1/8 of an inch wide (if your wood is thoroughly dry), or else anyone on high heels is going to catch them and fall. If your wood had not been allowed to dry, fit the planks tightly, so that any gaps that appear as they dry stay small.
As you place each board, check the cut end, and make sure that the grain lines curve downwards. If you don’t do this, the board edges will follow their natural tendency to “cup” as they dry out. Placing them downwards like this will keep the boards nice and flat for the long haul.
When shopping for wood, most planks won’t be perfect, but try and buy ones that are reasonably straight. When they’re not perfectly straight, you can fasten one end and, using a pry bar, pull the board straight, fastening as you go.
Chris sanded and sealed his deck with a water-based product. You should wait for about 6 weeks before doing this, to allow the wood time to dry out and acclimatize to the outdoor conditions (most wood is sawn when wet). Chris used an orbital sander and a medium 80 – 100 grit sandpaper), and sanded only just before he was ready to seal.
Your local building code will govern whether you need to have stairs or not – usually at about 18 inches or 2 feet, you will need to have stairs (we’re going to cover stair building in a future post).
Conclusion
This post isn’t meant to replace your own research – make sure you get a good deck building guide to help you. Chris recommends “Better Homes and Gardens Step by Step Deck Project”.
by Jennifer Priest
Follow me on Google +


Thanks for this insight, however I would have to disagree with your recommendation regarding the decking board layout. You say…