Detail Your Bathroom the Jennifer Priest Way
 Sadly, I think the people who really need to read this post never will. Regardless, and at the risk of preaching to the choir, I offer for your consideration the following love letter to my own neat freak proclivities.
First Thing’s First: Why Bother?
Before you spend a lot of time and money on bathroom renovations, I recommend that you adopt an intensive weekly cleaning regimen for a number of reasons:
- To figure out if you actually need to renovate. Maybe the problem isn’t the bathroom design– maybe the problem is that it lacks TLC. The bathroom is one of several rooms that will benefit from extra attention: subtle things like dusty baseboards or ceramic surfaces that don’t shine can really drag down a bathroom that is essentially practical to use.
- To figure out if you “deserve” a new renovation. What’s the point of going through a bathroom makeover if you’re just going to let it become a pig sty? Not even the sleekest faucet design looks good covered in toothpaste spatters, and there’s not a bathtub in the world that will look inviting with foot stains on the bottom.
- To help you figure out the scope of the renovation. Perhaps you don’t need gut the room and start over. It may be the case that most of the bathroom is fine, and you just need to solve a couple of key problems.
- You’ll really get to know the subtle flaws of the room, which will help you plan your new design and choose fixtures. For example, my toilet has a contoured surface at the bottom that shows the outline of the pipes, and the four knobs used to secure the toilet to the floor. Cleaning this every week for a few years has made me vow to purchase a model that has a smooth surface that hides these features on the inside (and it will be a low-flow, dual-flush one, of course!).
- It can be done in an eco-friendly way. Let’s face it, eco-friendly products aren’t always as effective as the toxic ones, and you’re going to need to use a little elbow grease. It’s faster and better in the long run to clean regularly, rather than to let the filth accumulate so that you lose a full day scrubbing.
- Whether you’re planning a renovation or not, you’ll enjoy the space more.
- You’ll help prevent the development of mould. A really good exhaust fan is also essential for this. Once mould gets started, it can be really difficult to get rid of, and it can cause serious lung infections and other health problems.
- Hygiene. Come on, this is the bathroom! Yuck.
So go pour yourself a gin & tonic, crank up the tunes, and let’s get at ‘er.
You Will Need…
- A tidy surface that’s conducive to regular cleaning. If you have to clear away bucket loads of grooming products, decorative objects and potpourri bowls before you can even start, you’re far less likely to clean as often as you should. I have ONE decorative item, but those with less self-discipline may want to go with nothing until they have imprinted on the weekly habit. I keep everything organized by grooming task in handy caddies that live outside the bathroom. Each one is easy to bring in when I shower, or do makeup, etc. This system is also more hygienic: one study I read showed that anything within 6 feet of a toilet gets covered with aerosolized sewage every time you flush. Another tip: I always hang the bath mat when not in use.
- Baking soda. This gets used in the bathtub, within the sink, and inside the toilet. As a mild abrasive, it is amazing for removing soap scum. The down side is that baking soda can leave a powdery film if not thoroughly rinsed away, so I restrict its use to areas that will get a full rinse with water.
- Vinegar in a spray bottle (and good ventilation). This is used for surfaces like formica countertops, walls, the outside of the toilet, and door handles. It may be a good idea to run the steam fan when you use this, because vinegar can really sting your eyes.
- Isopropyl alcohol (99%). This is for mirrors and anything with a metal or glass finish. Vinegar leaves a cloudy finish that worsens with time. Don’t buy rubbing alcohol- that’s a liniment with other ingredients that will cause streaking or clouding. My partner Justin came up with this one.
- Scrub brush – use in the bathtub and sink, with the baking soda.
- Paper towels – for countertops and other areas you use the vinegar or rubbing alcohol.
- Toilet brush – for the inside of the toilet.
- Toilet paper – use for cleaning the toilet seat and the rest of the toilet outer surface.
- Wood cleaner, if your cabinets are made of wood.
Here’s The Process
I clean the bathroom in the following order – you may need to adjust the process to suit your particular needs. In general , I work top to bottom, except that I leave the mirror for the very last (to avoid having to re-do splashed areas). I also work messy to clean: I do any baking soda cleaning first, then vinegar, and then the alcohol.
If any bathroom users need to shave or use clippers, have them do so before you start. Bristles are fiendishly hard to round up, no matter how conscientiously the shaver tries to tidy up afterwards.
- Clean any soap dishes with the scrub brush and vinegar, then remove from the bathroom until the cleanup is done.
- Pour about a cup of baking soda into the toilet bowl, and scrub with the toilet brush, ensuring you get the water line, and the rim of the bowl. When done, I leave the brush can slightly open so that any water caught in the brush can evaporate.
- Add a good handful of baking soda to the inside of the sink, add a little water to form a paste, then have at it with the scrub brush. Try to keep the baking soda away from the rim of the sink, and rinse well.
- Add about two cups of baking soda to the bath tub, make a paste with water, and scrub scrub scrub! Get the surface pared down to its very molecules. Give the bottom of the tub special attention, and also make sure that any bends in the tub surface get the full business – once rinsed, these areas will gleam pleasingly.
- Spray vinegar on a paper towel or sponge, and do any wall areas that need attention. Make sure you get areas where people put their hands, like the door frame and near the light switch. Hair can sometimes get stuck on the wall because of shower steam, which will look bad if left in place.
- Spray vinegar liberally around the sink, and counters (assuming they’re formic, not wood). Make sure you really get the base of the faucet, where it connects to the sink. This will help flush out any bristles that may be hiding. Mop up with a paper towel.
- Spray the entire toilet area with vinegar, as though your life depended on it. Do the inside of the toilet lid, top and bottom of the seat, and the entire outside of the toilet. Don’t forget the flush lever. Mop up with toilet paper, and flush as often as needed (don’t let too many toilet paper wads accumulate, or they may clog your toiler). Never try to flush paper towels.
- Spray the floor around the toilet with vinegar, and mop up with toilet paper. Get in behind the toilet and do the baseboards and any exposed fittings that connect to the wall.
- Do the rest of the baseboards and the floor with vinegar & paper towel. I scrub the floor this way because I have vinyl flooring – if you have tile or wood you’ll want to use the appropriate method. The key point here is that the floor really needs a good cleaning, because people’s bare feet are on it all the time. You don’t want moisture from show steam mixing with dead skin cells and forming disgusting foot slime (sorry to be so graphic: it’s gross, but it’s true). I get down on my hands and knees and scrub so I can inspect my work as I go. People with larger bathrooms may be tempted to go with a sponge mop – don’t do it! They don’t get the job done as well, no matter how much you lean into it (although I do acknowledge a scrub brush on a stick will work for tile).
- Do the rim and outside of the bathtub with the vinegar and a paper towel.
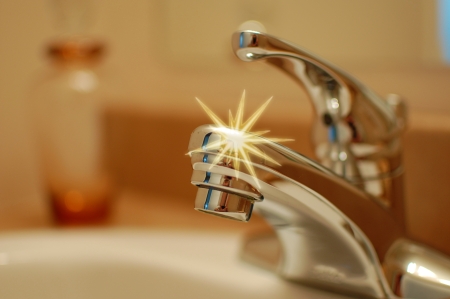
- Now you’re at the sweet part: pour some rubbing alcohol into a paper towel and go over any faucets and other metal fixtures.
- Finish up by applying the alcohol to the mirror, and then polishing with a dry paper towel. If the mirror is spotted, you may need to do a first pass with vinegar or water – the alcohol doesn’t take care of toothpaste or soap well. Don’t forget, you want to apply with a paper towel at this stage, not spray – you risk spotting the faucet if you do.
- Stand back, and gaze about in awe. You’ll actually be able to hear the sound that light makes (gleam! gleam!) as it bounces off your perfect surfaces.
Observant readers will notice that I have not covered shower tile and tile grout. Because the shower area is religiously squeegeed after every use, I clean grout in a separate monthly operation, using baking soda and a scrub brush. You should also note that Mike Holmes does not recommend sealing tile grout.
As for shower curtains, I must confess my lack of expertise in this area. I pretty much just squeegee the water off after every shower, and give it a periodic scrubdown: that seems to be working so far. My curtain is transparent, so I can keep an eye on the situation and watch for trouble.
For those readers who may feel I’m putting way too much into this, I can only profess that madness is its own reward.
by Jennifer Priest
Follow me on Google +


Great post! It's good to be reminded of the basics every once in a while. You can put a plastic…