Create Unbelievably Flavourful Thai Curry Paste

Mash mash mash! My husband Justin getting down to business. He finds just putting the mortar and pestle in his lap dampens the noise and gives him the right body postition.
Lots of home cooks are inspired by the flavours and recipes of Thailand. It’s not hard to see why. Spicy, savoury, and succulent, there are lots of dishes that are perfect to banish the chill of winter or to cool the heat of summer. But the critical ingredient in many of these recipes – the curry paste – is often an off-the-shelf variety that isn’t exactly the symphony of flavour explosions we’re all looking for.
If you really want to push your Thai curries over the top, make your own curry paste from scratch and use it in your recipe. It takes a few hours to make, but there are many advantages that will make this worth your while. It’s not expensive, it lasts (it even freezes well), and you can pack it full of flavourful ingredients, tailoring the balance to your own preferences. It will even give you a nice upper-body workout. Why? You’re going to need a large mortar and pestle, and you’re going to spend some time pounding the heck out of the ingredients!
As you’ve probably guessed, this is why most people buy the off-the-shelf stuff. Making curry paste takes time and muscle. Don’t get me wrong – you don’t need to be a bodybuilder to do this (after all, I can do it) but you do need to be persistent, and that means endurance. Most of the ingredients in this recipe are fibrous, and won’t mix well if you just toss them in the food processor. They need to be beaten up a bit first.
This recipe makes a large batch of paste – you can reduce the volume of the ingredients if you’re not sure. But this is how my husband makes it, and it tastes fantastic. Let’s get started!
Curry Paste Ingredients
You should be able to get these in a Thai grocery store near you. In Ottawa, we go to Manphong in Chinatown.
You’ll notice there are a lot of estimates in the list below. The recipe changes slightly every time my husband makes it, and he eyeballs the ingredient volumes. Because ingredient qualities and flavour strengths vary anyways, I’ve never been a huge believer in precise measurements.
Here’s what you’ll need:
- Shallots – 6
- Lemongrass stalks – 3
- Bird’s eye chilies – 2 small bags (about two cups before chopping). Add even more for a more traditional style curry paste.
- Galangal (also known as Thai ginger) – 3 really good sized knobs
- Garlic – 1 large bulb
- Coriander seed – about ¼ cup
- Cumin seeds – about ¼ cup
- Kaffir lime leaves – about 20
- Shrimp paste – 3 tablespoons
- Oil – we used canola – 1/3 to ½ cup
- Fish sauce – ¼ cup
- Golden Mountain sauce (a brand of Thai soy sauce) – ¼ cup
Kitchen Equipment
You’ll need the following tools:
- Colander
- Cutting board
- Knife
- Mortar and pestle – the bigger the better
- Food processor – we used one with about an 8 cup capacity and filled it
- Wide frying pan
- Spice grinder
- Measuring cups: ¼, 1/3
- Onion goggles are really handy but not essential
Method
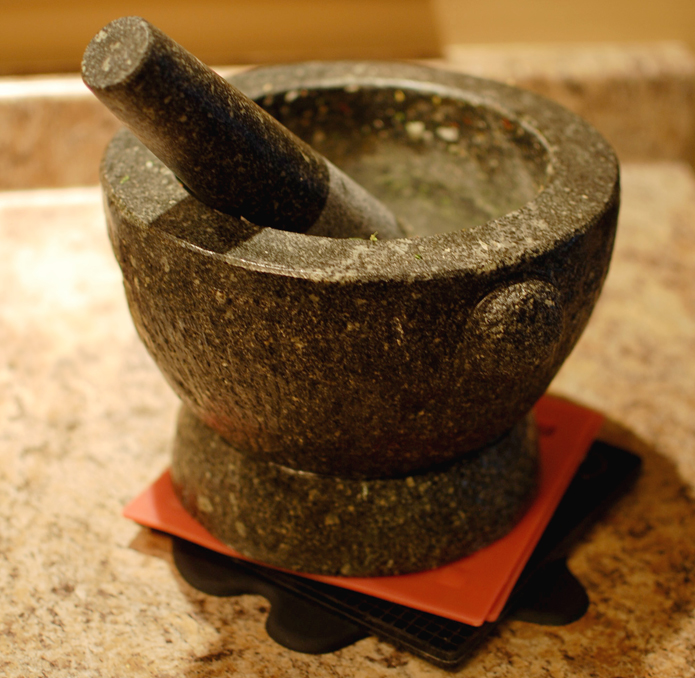
Mortar and pestle, sitting on multiple silicone mats for grip and noise reduction.
It’s not complicated to make Thai curry paste at all – you just need some time and some oomph. For most of the ingredients you’re peeling, slicing, mashing, and then transferring to the food processor.
Mashing Tips
- To reduce the noise from pounding, you can pile a few silicone mats under the mortar. This also helps prevents it from sliding around. Or, you can sit on the kitchen floor with it in your lap like my husband does!
- Let the weight of the pestle do the work – this is why bigger is better!
- Mash into the bottom of the pestle, not the sides
- Try to always keep food between the mortar and pestle so they don’t hit each other directly
- Every once in a while, spread the mash out to find intact pieces
- Once you’ve broken up the larger pieces, running the pestle around the inside of the mortar in a circular motion finishes the job
Preparing the Ingredients
1. Peel the shallots, then mash them in the mortar and pestle – just enough to break them up a bit. Collect the pieces and put in the food processor. (This is the part where I always wish I owned onion goggles.)
2. Peel the garlic, remove the tails, and mash to a paste in the mortar and pestle. Transfer to the food processor.
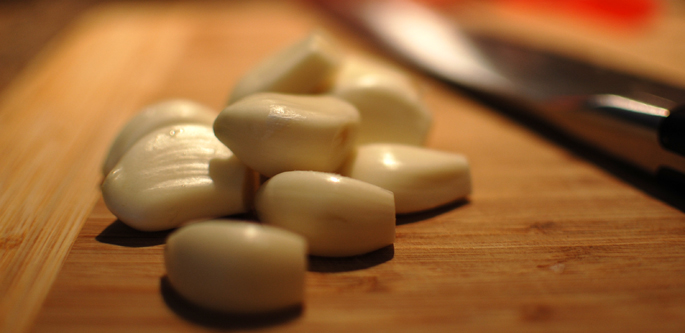
Mmm, garlic.
3. Remove the papery outside layer of the lemongrass stalks. Cut each stalk so that you retain the bottom third. Slice thinly to help it mash better. Lemongrass is very fibrous but still needs to be reduced to a paste. Pound it up in the mortar and pestle and then add the paste to the food processor. Are your arms tired yet?
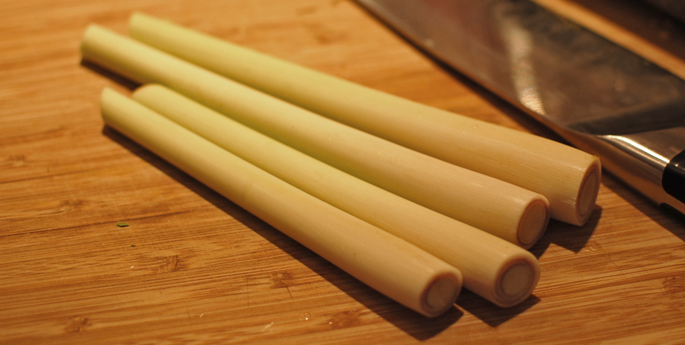
Lemongrass stalks, ready for slicing.
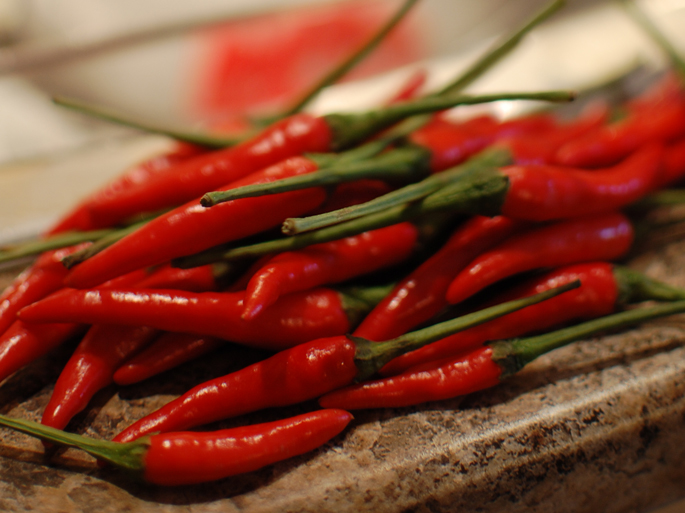
4. Snap the stems off of the bird’s eye chilies, then rinse thoroughly. Slice finely, and then – you guessed it – mash mash mash! Don’t worry about reducing the seeds to a paste as much, you’re main job is to break up the pieces of skin. Once everything has been ground up nicely, move the paste to the food processor.
Bird’s eye chilies – they can be red or green. Thai curry is defined by whether the red or green ones are used. The flavour isn’t much different, even though green curries are traditionally spicier.
5. Rinse the galangal, and chop off any dried cut faces and any overly brown bits. Then chop finely and mash to a paste in the mortar and pestle. Into the food processor it goes. Feel the burn in your arms!
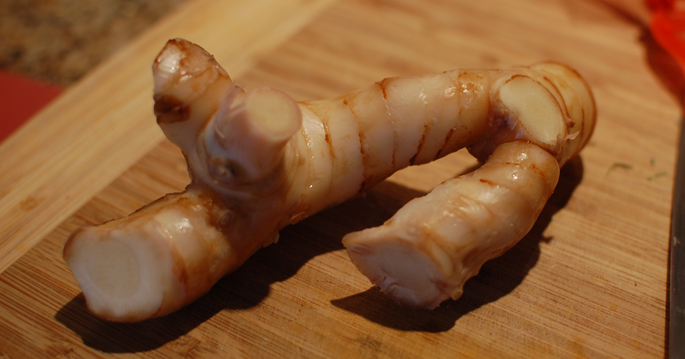
Galangal root – it smells like pine, and has a subtle but savoury pine flavour. Galangal is the magic ingredient that makes the flavour of this curry paste really pop.
6. Rinse the kaffir lime leaves. Remove the central stem from each leaf, so you have a bunch of half-leaves. Slice these into matchsticks, then grind them thoroughly in the mortar and pestle. Add to the food processor.
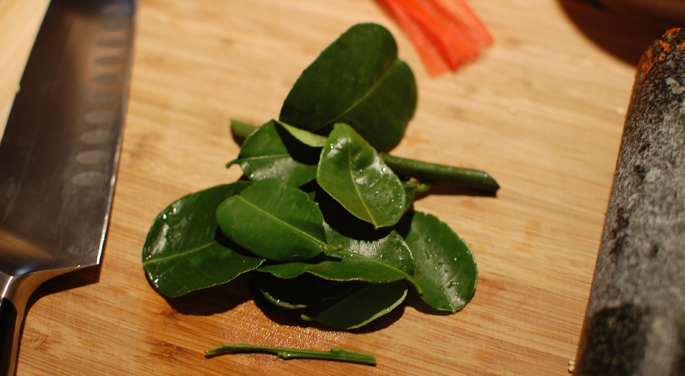
Kaffir lime leaves
7. Phew! A break from mashing. On a medium-high heat, dry-roast the coriander and cumin seed together. A wonderful smell will rise from the pan. When you start to see a bit of steam rising, lift the pan away from the element and lightly toss the seeds in the pan. Remove from the heat and toss a few more times, then allow to sit for a few minutes. Once the mixture has cooled down, grind in a spice grinder (or mortar and pestle!) and add to the food processor.
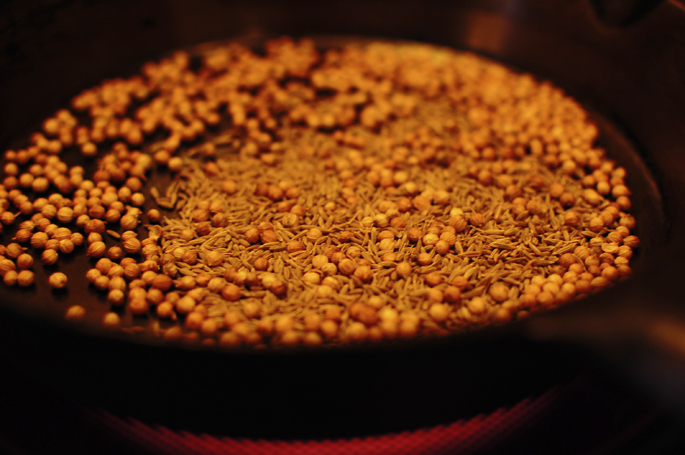
Dry-roasting the coriander seeds and cumin.
8. Add the shrimp paste, oil, Golden Mountain sauce, and fish sauce to the collection of ingredients in the food processor.
9. Grind all of the ingredients together in the food processor for several minutes, until it is a thick sauce. You’ll still see small fragments of chili skin, but they should not be wider than 1 mm square or so.
That’s it! Use as needed in your Thai curries. This particular paste isn’t crazy spicy by average Western standards, especially considering the paste will be going into curries that often contain a lot of coconut milk. If you like, the spiciness can be amped up by adding more bird’s eye chilies. The real beauty of this particular formula is that it has tons of galangal, and that’s what really pulls all the other flavours together. This is what I feel is missing from the off-the-shelf curry pastes you can buy in the store. But you should experiment with the ingredient amounts to get the taste that works best for you.
This curry paste will last about 2 weeks in the fridge because of all the oil and salt, and it also freezes well. Special tip: if you freeze in small batches (say, half-cup portions), the flavours can be adjusted for each batch once they’re thawed.
Later on, we’re going to be sharing a recipe for a Thai curry that uses this paste as a base.
By Jennifer Priest
No comments yet.
Add your comment